How to Install PCSX2
With PCSX2, emulating PlayStation 2 games on your PC is easier than ever. This guide will assist you in the installation of PCSX2 and confirm everything is ready to run your favorite PS2 games with much better graphics and increased performance.
Installation of Visual C++ Redistributable Package
If you haven't installed a Visual C++ redistributable, you should do that first before the PCSX2 package can be installed. This software component is needed to run PCSX2 and other applications properly that use Microsoft Visual C++ runtime libraries.
For PCSX2 versions 1.7.0 and above, ensure you download and install the Visual C++ 2019 x86 Redistributables. These are often bundled with Visual Studio 2015, 2017, 2019, and 2022 releases. If you are on an older build of PCSX2 (1.7 and below), you may also have to install the 32-bit version of the redistributable.
Why Visual C++ Redistributable is Important for PCSX2
The Visual C++ Redistributable is essential because it includes runtime components required by the application. Without it, PCSX2 might fail to launch or encounter errors during gameplay. Therefore, installing this redistributable is a must before setting up PCSX2.
Add FFmpeg for Video Capture (Optional)
If you're interested in recording your gameplay, adding FFmpeg libraries to PCSX2 is a great idea. FFmpeg is a versatile tool used to capture and encode video streams, allowing you to record high-quality gameplay footage directly from PCSX2.
How to Add FFmpeg to PCSX2
- Download the necessary FFmpeg libraries for Windows from the official FFmpeg website.
- Extract the ZIP file you downloaded using a tool like 7-Zip.
- Place the extracted DLL files in your PCSX2 installation folder, located next to the main PCSX2 executable (
pcsx2-qt.exe).
With FFmpeg installed, you’ll be able to record gameplay sessions directly within PCSX2, making it easier to share your experiences or create content for platforms like YouTube.
Downloading and Installing PCSX2
Extracting PCSX2
Now that all the prerequisites are in place, it is time to install PCSX2.
- Go to the PCSX2 download page and download the latest Nightly build suitable for your operating system.
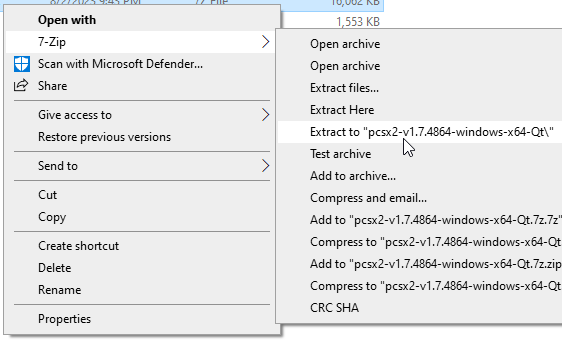
- After the download is complete, use 7-Zip to extract the contents of the archive:
- If you don’t already have 7-Zip installed, download and install it first.
- Right-click on the downloaded archive file and hover over the 7-Zip option in the context menu.
- Select "Extract to [folder name]" to extract the files to a designated folder on your system.
Setting Up PCSX2 for the First Time
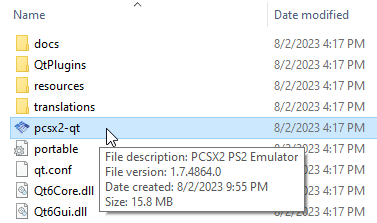
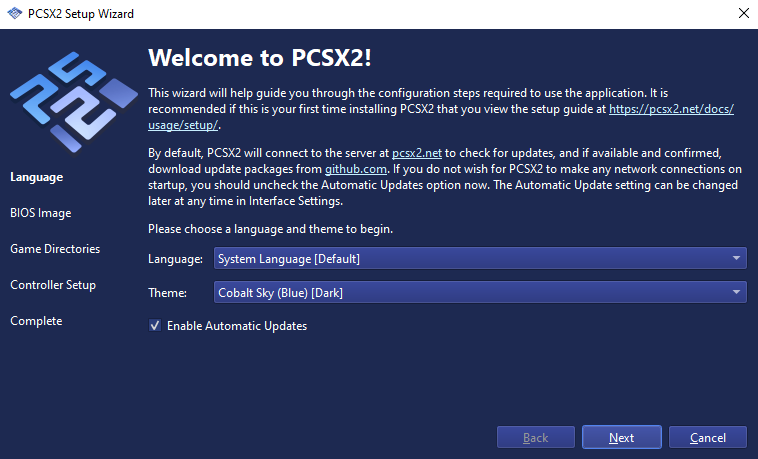
Once the files are extracted, navigate to the folder and find the pcsx2-qt.exe file. Double-click to launch the PCSX2 setup wizard.
- Follow the on-screen instructions to configure the emulator settings. During the initial setup, you can choose your preferred language, adjust graphics settings, and map your controller inputs.
- Similar to save files, you can customize the location of Save States to fit your preferences during this setup process.
After completing the setup, you’re ready to start playing your favorite PlayStation 2 games on your PC.
Need more help? Check our download page for more information and to fix all common issues.